Update: 1/4/2027 - Use Launch box as your Frontend!
I found a new Frontend that kills the competetion when it comes to an x86 solution. Launchbox - https://www.launchbox-app.com/
If you are planning on making a MAME cabinet such as the one I did here years ago, I suggest you use Launchbox. Afforable and reuglarly updated. And VERY easy to install and setup. My suggestion is to use a MINI PC with Windows 10. This offers the best experience in my opinion. 50$ for a lifetime sub. Check it out.
https://www.launchbox-app.com/
The Cabinet
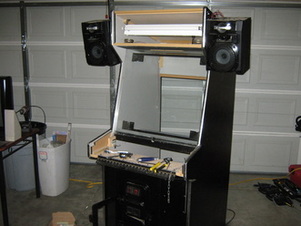
I am not sure how to go about telling people how to select their cabinets because it is really just a matter of imagination. Anything can be done if you dream it. The most important part about selecting you're cabinet is realizing your finished product. Do you want a cocktail cabinet? (the sit down kind) or stand up cabinet? Do you want enough room for 4 players? or 2? The possibilities are ENDLESS! My advice is to get a hold of a cabinet that fits your needs. The style doesn't matter, that is up to you. YOU be the judge, and do not settle for anything less than what you want. I just happened to stumble upon this old Virtua fighter cabinet for 50$ on Craigslist. The guy gave me a screaming deal.
If you want to build your own cabinet and you have the tools necessary to complete the job then check out THIS SITE. I think that is is easier to find a free or an old cabinet someone is trying to get rid of. Make sure that the cabinet you select has your idea in mind. Dont use a cabinet that is too small or too big. Find the easy medium.
If you want to build your own cabinet and you have the tools necessary to complete the job then check out THIS SITE. I think that is is easier to find a free or an old cabinet someone is trying to get rid of. Make sure that the cabinet you select has your idea in mind. Dont use a cabinet that is too small or too big. Find the easy medium.
The CPU
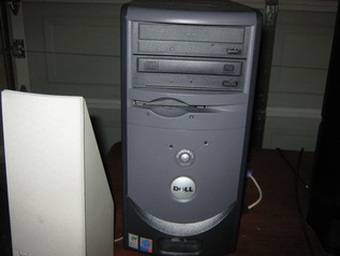
Let's face it. Do you really need a powerhouse of a CPU to run games from the 70s, 80s, and 90s? Nope! This part is actually one of the easier areas of the build. A 5 year old computer at your local thrift store or Craigslist is all you need. I recommend at least a Pentium 4 processor with 1GB of memory, and a 128 MB PCI or better video card (This is all dependent on what you want to do). There are 200$ computers on Newegg all the time that would be more than enough. The hard drive space is completely up to you. I like to have a lot of space so I can put a ton of games/emulators/music on my systems. Usually 150GB is fine (for me). One thing to keep in mind is the video card. Make sure it is from ATI. ATI has superior resolution settings compared to NVIDA. I highly recommend an ATI video card for your setup. Also, Windows XP is recommended. By the way, I found this PC on Craigslist for 30 bucks. To be honest I would say that dual core CPU would probably be ideal. Those can be found all over craisglist or ebay for very cheap. If you plan on running games with "intensive" 3D graphics then a CPU that can handle more "graphically" intensive games is probably more down your alley. Also if you choose to use a computer with adequate onboard graphics then you should be fine. The bottom line is, to have enough power to run the games you want to play. Just do some simple research and figure it out. There are many MAME roms that still to this day do not run properly on MAME. Again, do your research.
The Wiring
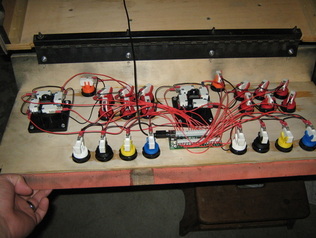
Relax! It doesn't take a rocket scientist to do this. And I will explain it so you will understand. First off you need whats called an IPAC. An IPAC is basically a small circuit board designed to handle keystroke commands at a fast and/or equal pace as a regular PC keyboard. This device usually runs about 50$ and is essential if you are going to to wire arcade style buttons to your cabinet. I have seen some USB joysticks (cuts out some wiring). The best part about USB joysticks is that some can be configured to a analog setting (allowing you to play certain games that require it). Also available are trackballs. These are balls with bearings on them that let you play games such as Golden Tee. Some games require them, most do not, this add on is completely up to you (and can be added later). Alternatively you can order a complete control console to fit into your existing setup and all you have to do is plug in the USB cords and your good to go. These are great and easy, however if your on a budget then this is not an option. The IPAC's come with the wiring instructions and any wire will do as long as the gauge is small enough to work correctly. Let me make this clear. The IPAC is USB 2.0 compatible, and will work as a controller device just fine. Take your time and make sure the connections are snug and clean. Use connectors when possible.
As a alternative you could buy a USB controller which will work great and save time in hassling with connecting wires and such. A good arcade stick that I have found is the XARCADE.
As a alternative you could buy a USB controller which will work great and save time in hassling with connecting wires and such. A good arcade stick that I have found is the XARCADE.
The Monitor
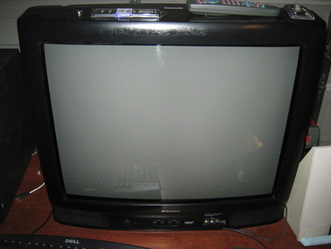
This is actually quite important. From my knowledge there are some things to keep in mind when selecting a good monitor to use for your arcade. You have a number of options such as using an LCD or CRT monitor. And also the different display settings such as HD and SD. When I decided what I wanted to do with my cabinet I wasn't worried much about going HD or LCD. I wanted the authentic arcade feel of a lower resolution. I have read on several sites that using a decent CRT TV with an Svideo input will do the job quite nicely. I have heard bad things about using the RCA inputs (Red, Yellow, white) because the display turns out muddy. Svideo however produces more lines closer together so that this doesn't happen. So if your going to use an old TV make sure it has an Svideo input. It is very possible to use an old computer monitor or a new LCD TV or computer monitor. It is up to you. Being on a budget this was not an option for me. Also one thing to keep in mind is the size of the monitor, and if it will fit into the cabinet. Also, your going to want to hide the buttons and monitor border with a bezel so make sure you pick a display where you can do this easily. One last thing is to try and get a TV with an auto power on feature. Meaning that if the power gets cut, next time power returns to the unit it automatically powers back on. This 27in TV pictured here was purchased at a local thrift store for 40 bucks. Personally if you are building a nice setup I recommend using an LCD. It's much lighter and easier to hook up to the CPU.
The Look
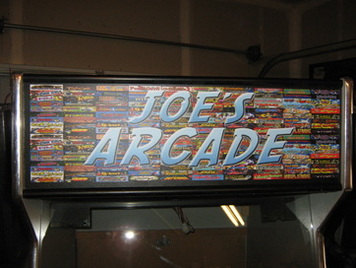
This is the fun part. ANYTHING can be accomplished. The SKY is the limit! Be creative! You will probably want some decals to go on the side of the cabinet and a marquee for your lit headline. There are a bunch of different things you can get. For the marquee I went to http://www.gameongrafix.com/ They print out some GREAT custom marquees for your cabinet. This is a must! The second thing is the buttons. What color do you want? Want to light them up with LED's? It CAN be done. My main source for cabinet parts is SUZO-HAPP. They carry most everything you need to complete your system. I did not choose to do LED back lit buttons because this was my first build and I didn't want to get to complicated. To Light the LED's takes a bit more work to get going and I decided not to do it. But hey, if your more ambitious than me then go for it! The possibilities are ENDLESS! Use your imagination!
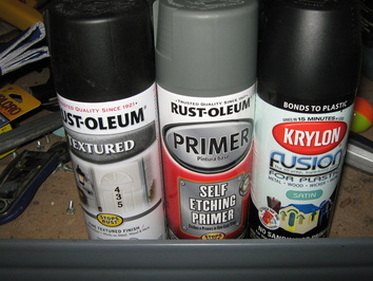
You probably want a good looking cabinet so I suggest you paint it. This is a must for me because looks are KEY in this project. Do NOT try and be cheap on the paint. I have used Wal-mart 99 cent paint and it SUCKS. Spend the 20-30 bucks and buy some good paint. I used the Fusion paint on the cabinet, and the Primer and textured paint on my custom control panel. Primer is a good idea because it makes the paint stick and last. I used the primer on my control panel then sprayed it with a black textured paint. I wanted a nice textured finish to give it a *PLAY ME AND ABUSE ME* feel. Again, DO NOT go cheap on the rattle cans.
The Sound
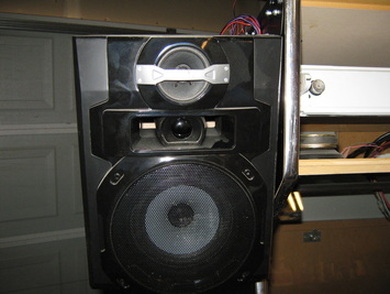
You have this bad ass gaming cabinet so you cannot forget about the sound! This is probably the simplest thing you can do. Run a wire from you're computer speaker output (1/4in jack) into your sound system of choice. I went with an old RCA receiver with 2 RCA speakers that I had on the shelf collecting dust. I mounted them on each side of the cabinet so that the players get the best sound. And when in jukebox mode it produces clear and great tones for the party. A 1/4 inch jack (from PC) to an RCA (red/white) out is perfect for this and can be done for a few bucks for the cable. What you spend on the receiver and speakers is up to you. There are many ways to hook your sound up, but I like my way the best. Again, THE SKY IS THE LIMIT!
The Software

To do this right you need to have the right software. First off you don't want windows starting up with screens and a GUI that resembles a PC. To do this justice and make it like a REAL arcade machine you need some software. I highly recommend Maximus Arcade. This is worth the 25$ it costs. It allows you to run EVERY emulator under the sun. If it exists, it will run it. It will also run a jukebox program and play your favorite music also. It is very easy to setup and this is a MUST. These are called "front-ends" CHECK IT OUT! I recommend getting your setup going OUT of the cabinet first before installing it. For me it made more sense to do this as I would not be fumbling with problems while everything is installed. I find it easier to tweak settings this way. Remember to put all the emulators and music on your computer first. Test TEST TEST!! Thing will never go as smoothly as you would like. This is why it is important to test your machine on another PC or before you actually put everything inside the cabinet. It makes it much easier than having to tear apart the back end of the cabinet just to tweak things every 5 seconds. This method saved me hours of headaches. Recently I changed my frontend to something a little more appealing. Hyperspin. After using hyperspin I have come to the conslusion that maximus is probably a better way to go. There are other options such as THESE.
